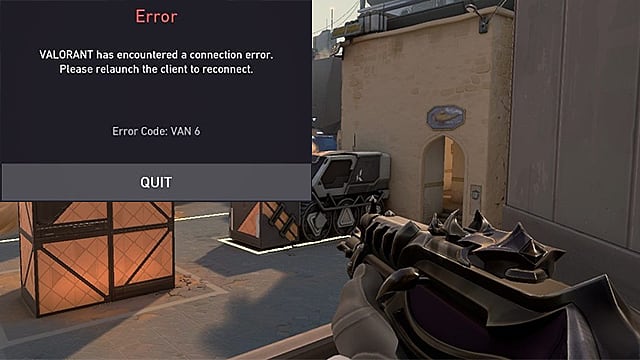
Error code VAN 6 has been popping up for Valorant players more and more recently. Players unfortunate enough to be met with the error find themselves unable to join matches, making the game unplayable. While the error may sometimes be caused by server issues that are out of the player’s hands, the error is also caused by other factors. Luckily some of them are easy fixes.
Check out all of our quick and easy fixes to the game breaking VAN 6 error code down below.
VAN 6 Error Fix Step 1. Configure your Windows Firewall
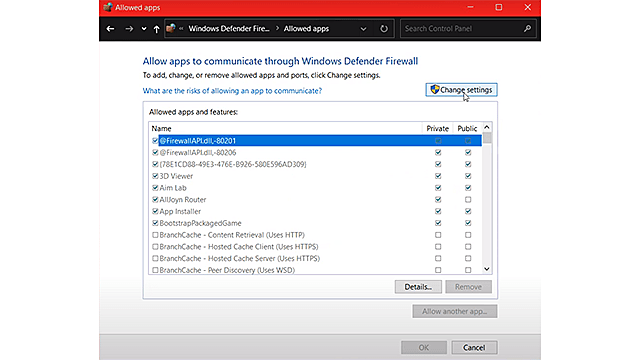
One cause of the pesky VAN 6 error code that players have discovered is related to the Windows Firewall. Specifically the PC protection service, or any antivirus program, may be erroneously identifying one of Valorant’s important game file’s as a risk to your computer. Luckily, there is a fix.
Search for Valorant within the Start panel, then right click the game to select “Open File Location”. Once this takes you to the game’s installation folder, copy the folder’s location. Then, make your way to the Windows Defender Firewall. Enter the firewall settings and select the “Allow an app or feature through Windows Defender Firewall" option. From there, select the “Change settings” option. Select the “Allow another app” option and then open up the “Browse” feature. Now, within the browser section, paste the Valorant installation folder location that you previously copied and select “RiotClientServices. exe. " Repeat this process again by returning to the “Browse” section under Window Firewall’s “Allow another app” feature. Then, rather than selecting “RiotClientServices. exe” under the Riot Client section, select Valorant folder under the Riot Games section. Select the “Live” folder found within the Valorant folder you previously selected. Next, select the “VALORANT. exe” file. Repeat the previous step by returning to the “Live” folder. This time, select the “Shooter Game” section, followed by the “Binaries” section. From here, select “VALORANT-Win64-Shipping. exe. "
Ultimately, this process will allow you to safeguard three important files from being erroneously quarantined by the Windows Firewall. If this has not fixed your error message, then there are some other solutions.
VAN 6 Error Fix Step 2. Configure Valorant to not run automatically
Another occasional cause of the VAN 6 error message has to do with Valorant’s anti-cheat system. For some, the game’s anti-cheating software, Vanguard, is booting itself up automatically. And, it’s causing some serious issues in the process. That being said, there is an easy fix to this game crasher.
Make your way to the Start menu. From there, enter “msconfig”. Select the System Configuration option to be greeted by a new window. Next, select the services tab from within the new window. You will be met with a tall list of programs. But, don’t get discouraged. Simply scroll down until you find the “VGC” program under Riot Games. Make sure the program is selected and hit “Apply” at the bottom right of the window. You may be prompted to restart your computer after applying these changes. Return to the Start panel. This time, search for “Run” within the system. From here, enter “services. msc” and select OK. Make your way to the Services tab and scroll down until you once again find the “VGC” program under Riot Games. Right-click on the program to bring up its Properties page. From here, make sure the startup time is set to Automatic and then select Apply before hitting OK. Lastly, close the page and restart your computer.
Once you have completed these steps, you can log back into Valorant. If you are still getting the VAN 6 error code after following these steps, then try these final measures that can save your game.
VAN 6 Error Fix Step 3. Complete these final steps if you are still having problems
In the unfortunate circumstance that your game is still facing the VAN 6 issue, there are two more major fixes that you can try. While these fixes are not as likely to solve the issue, they are the easiest to try.
First you will want to reinstall Vanguard, Valorant’s imperfect anti-cheat program.
Visit the Settings panel by selecting the cog icon within the Windows Start menu. Scroll through the Apps section until you discover the Riot Vanguard application. Then, select the Vanguard application and hit the uninstall button. Lastly, launch Valorant so that it can automatically reinstall the Vanguard application.
Sometimes programs can be downloaded and installed incorrectly, making the above solution a possible easy fix for the VAN 6 error. Likewise, reinstall Valorant with these easy steps to ensure you have covered all of your proverbial bases.
Visit the Settings panel by selecting the cog icon within the Windows Start menu. Scroll through the Apps section until you discover the Valorant program. Then, select the Valorant program and hit the uninstall button. Lastly, visit playvalorant. com to reinstall your game.
Once you have completed all of these steps, you should now be able to take back control of your game time. That being said, game bugs still happen. If your problem persists, contact support-valorant.riotgames.com to get to the bottom of your issue. If this worked for you, check out our other Valorant guides here on GameSkinny.